Projects Mini Update

Here are a few projects that I've been working on that I have yet to write about. I've managed to do a few projects between client work. Here's part of what I do for fun.

Going Cursive

April 2, 2014

Going Cursive

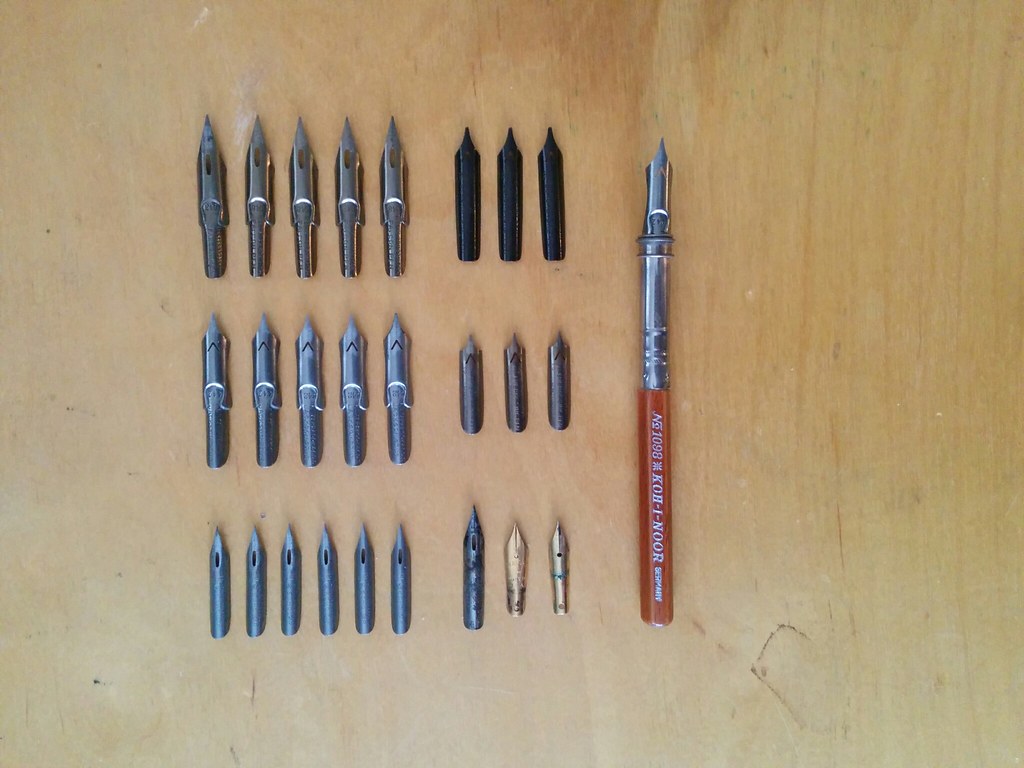
Found these nibs and a pencil extender in a thrift store. The previous owner used the pencil extender with a twig to hold the nibs in place. This has inspired me take to writing in cursive... just the way my momma taught me.

I journal every other day with a fountain pen now. My penmanship has improved, its become prettier... and its inspired me to change professions. I'm going back to school to become a doctor.

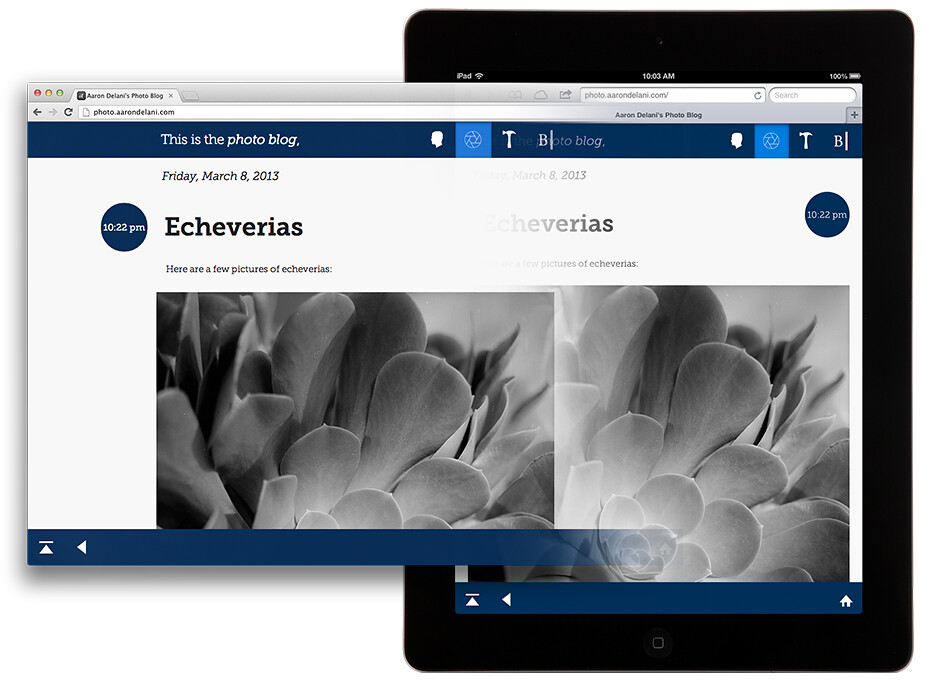
The First Zine, "No Ideas"

May 2, 2014

The First Zine

I've been a member of the Independent Publisher's Resource Center (IPRC) since March. I used to work from there. It was really motivating being there and being surrounded by creative people who were making zines, posters, pamphlets, books, and various other printed materials. After being there for quite some time, I decided to make a zine in my break time, twenty pages, nothing complicated. The problem was I had no ideas of what the zine would be about, hence the title "No Ideas."

The Minimalist Wallet

July 4th, 2014

Minimalist Wallet

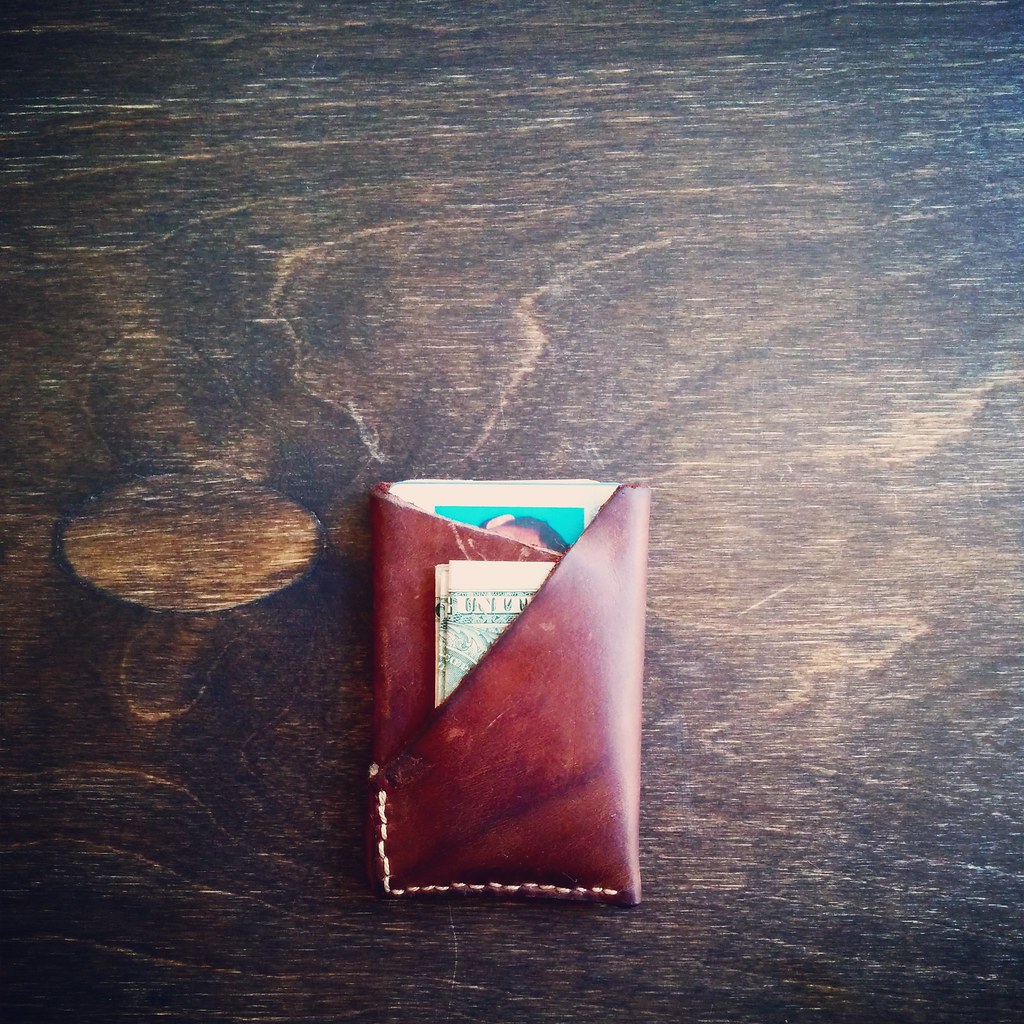
I've been playing around with the idea of making practical daily useful things. To start with this project, I looked at a simple object that I used every day, my wallet. I had a simple bifold, but I didn't carry that many cards or cash to begin with.

I designed and created three prototypes of this wallet. It is crafted out of a single piece of leather. The leather is tensioned, formed, and conditioned to the shape of the cards. It will hold up to 8 credit cards, 4 business cards, and 8 folded bills. The primary contents of the card, can easily be accessed with a simple thumb motion.

So far, this wallet has held up with daily use. I've designed a simpler version that has yet to be cut and stiched together. I guess I'm pretty content with the prototype I made. I gave the third prototype to a friend and he loves his.

"Rosie"

July 2014

Rosie

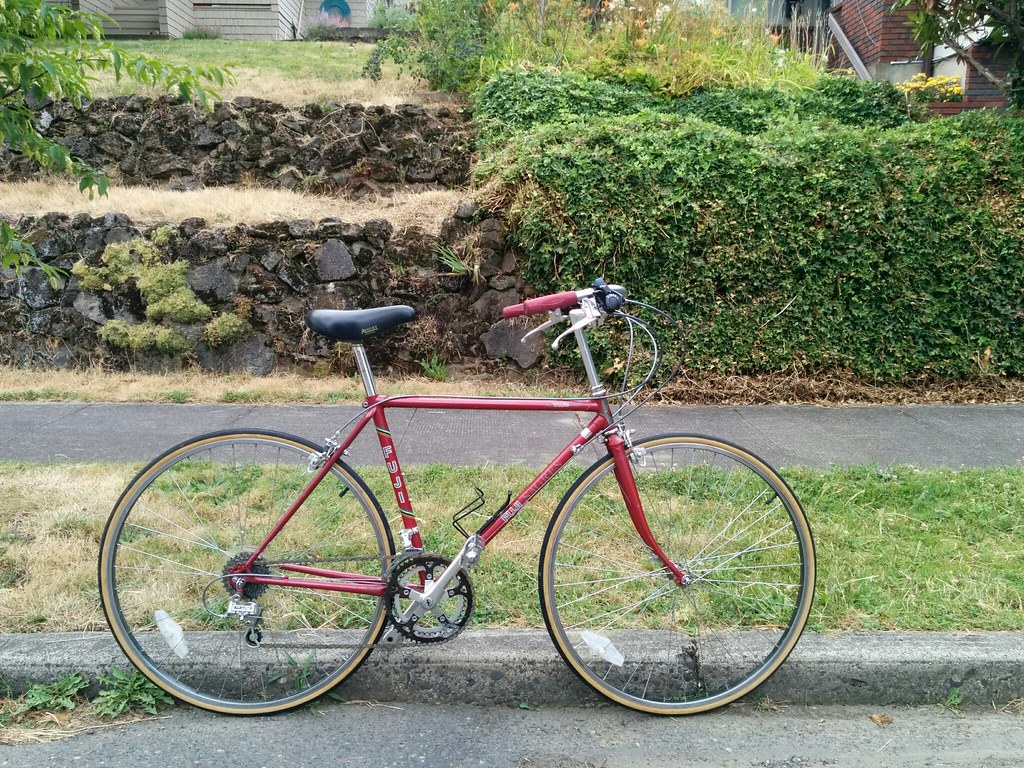
When a dear friend of mine told me that she was in the market for a commuter bicycle because of back problems, I started brushing up on prior bicycle repair knowledge. The bicycle that she used to commute with had a drop bars that put her in a crouched position for her more than twelve miles. After years of riding this way, it was giving her some back problems.

I managed to find a bicycle in the same frame size and posture as her previous bicycle. I mocked up the solution to her with simple flyway handlebars. I named the bicycle, "The Visitor" as it was only going to be with me temporarily, and if she didn't like it, I'd have an extra bicycle for potential visitors from out of town.

She loved the bicycle and helped build the rest of it. Even changing the shifters and tires at one point. She has thus named the bicycle "Rosie."

Rosie

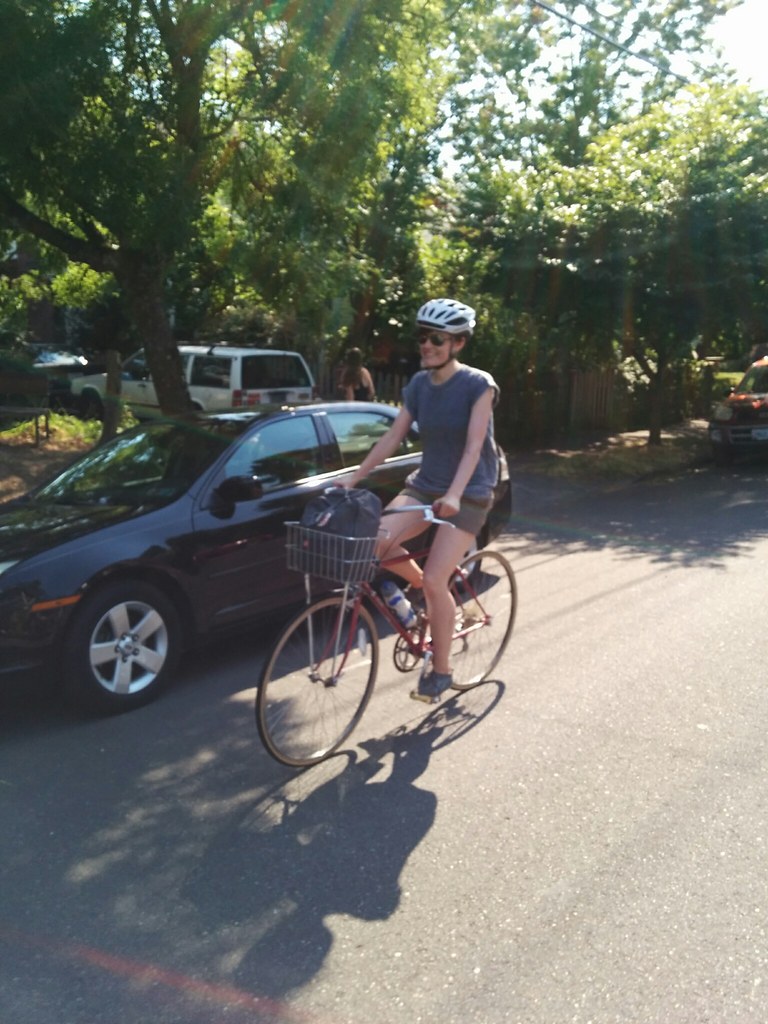
Rosie and her owner ride happily together with upright regal style on the streets of Portland.
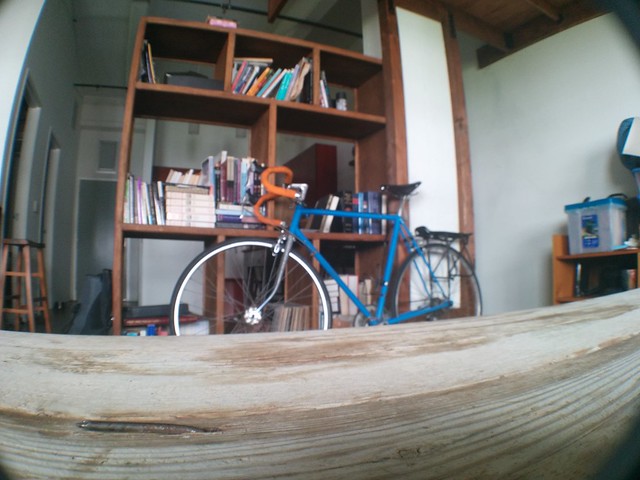
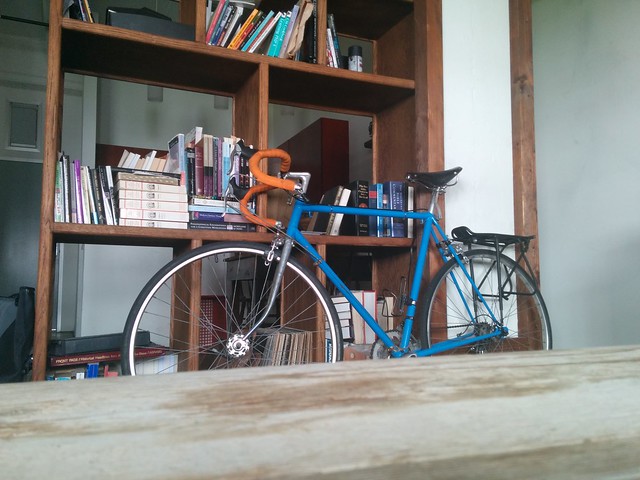
THE VISITOR

August 2014

The Visitor

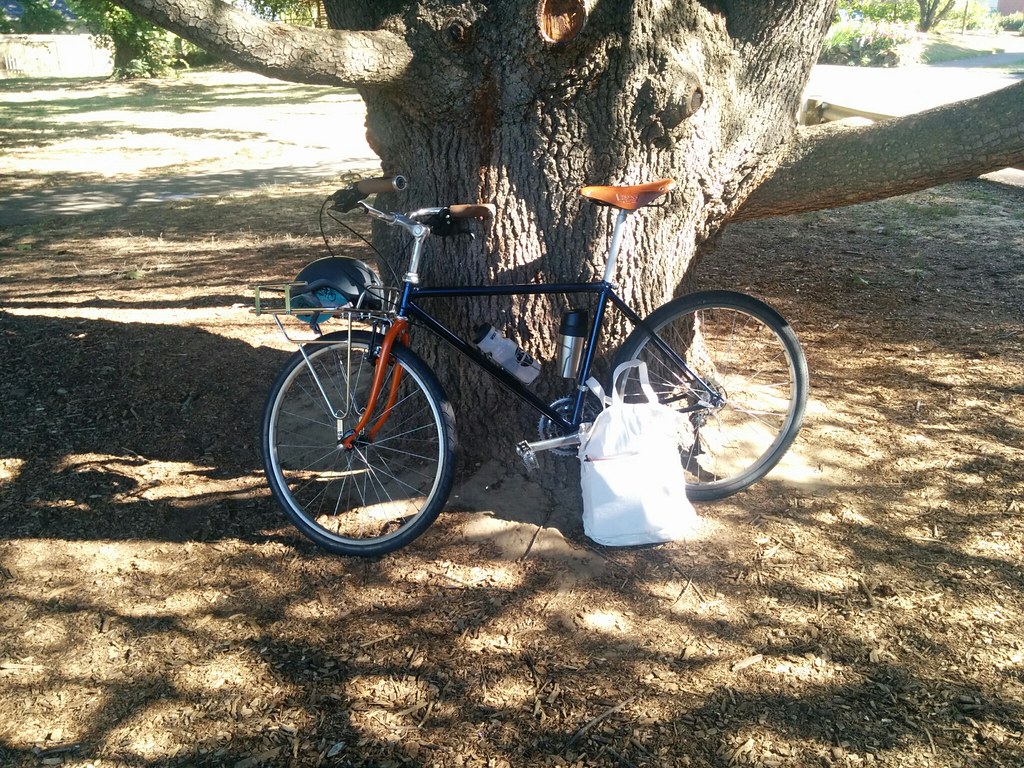
After building Rosie, I was inspired to build an actual bicycle for visitors. The bicycle needed to be adjustable for a variety of heights, compact, comfortable, and has an easy carrying solution without the use of panniers. The ideal candidate would have a low top tube and "fat" tires. An easy fit was a mountain bike frame.

I managed to acquire an old Bridgestone MB-2 Mountain bike from 1987 at a bargain. I had it powder coated and re-built the bicycle from the ground up. Its still currently a work in progress but its in very ridable condition. Equipped with a Soma Porteur rack, it can carry up to 40lbs of cargo. Its handlebar position and seat position is fully adjustable to fit riders 5'5" to 6' comfortably. Only problem is, the taller you are, the more awkward looking the bicycle gets.

The Mess Bag

September 8th, 2014

The Visitor and the Mess Bag

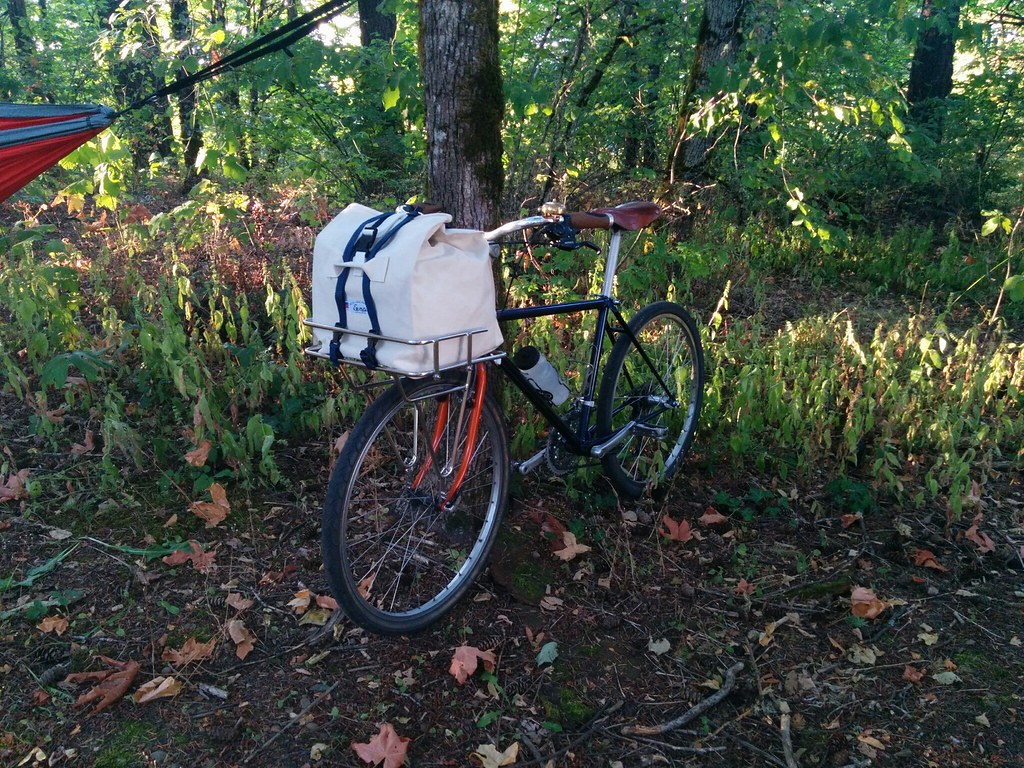
That's a simple bag I had commissioned a local canvas bag maker to stitch up for me. The dimensions of the bag are 12in by 12in. It fits in the porteur rack perfectly. The idea for this simple bag was to be able to throw in various things in it and have it just hold the contents. I can easily remove, stow and carry the bags with the straps that are attached to it.

So far, its proven really useful and easy to deal with. I've started imagining and designing a more versatile porteur bag that I'll be building myself in the upcoming months.


So, that's it for now, I'll hopefully elaborate more on these projects when I have the time... or you can force me to do so by letting me know in the comments section of this post.

Playing with the Photojojo Wideangle / Macro Lens

Introduction

A few months ago, I received a gift from a fellow photographer. It was packaged as though my friend was sending it personally, tuckered in confetti accompanied by a little toy dinosaur, needless to say I felt like it was my birthday last October.

This lil gadget is a set of lens. When fully assembled, it acts as a wide angle lens. When used with its primary attachment, it acts as macro lens. The primary attachment of the lens to the phone is typically made possible with small metal rings that you can attach to your phone or solid case.

IMG_9585

I own the Google Nexus 5, the N5 was seemingly engineered for attachments like this… the lens just attached directly to my phone without the assistance of the metal ring. Makes me think that the phone was made for photographers.

IMG_9595IMG_9596

For a while, I used to think that phone attachments like this are novelties bought by wannabe photographers using their phones, making “art,” embellished by Instagram filters with selfies, diptychs, galaxies, and bad typography. By the end of the month, this lil gadget changed my mind about that.

Build Quality and Price

The elements and components in the lens were impressive, I was expecting some plastic or acrylic lens, as it turns out, these lens are coated glass encased in machined aluminum. it has a lens back cover and plastic lens cover. The back cover comes with a little lanyard, which works great if you like small attachments on your phone case (if the case has a little area to attach lanyards to). I’ve used the little lanyard around my finger to hold the lens back as I was using the lens.

I’ve already dropped the lens a few times expecting one of the elements of glass to be cracked or scratched, or the aluminum housing to be bent or scratched as well… but so far, so good. This little thing has been abused in my pocket and laptop bag. Its so light that I forget that I have it in my jacket pocket at times. Its the perfect little size of lens to just have on you. I’ve seen other lens for phones on the market that are larger, even an intriguing one that touts professional grade glass elements, that does the job that these lens do, but I can’t justify spending over $50 on a lens set that would possibly break on the first drop.

Close up of the Photojojo Wideangle Lens set

I believe that these lens are built just right with a reasonable build quality and price at $20 for a single lens set or $99 for the complete lens set at Photojojo. Some might say that twenty bucks is kind of expensive for a set of small lens that you can buy directly from China, however, I love the idea of buying from Photojojo because their customer support is one of the best I’ve seen and talked with, and their crew is super cool; plus, Photojojo is a small independent team of developers, photographers, and people like you and me who curate such great commercial products and bring them literally to our doorstep (and apparently, with love).

Usage

The lens made it possible for me to take really wide shots in really tight spaces. Of course, these were test shots, very intentional test shots. Throughout the past few months, I realized, to use this lens, you have to be intentional about it. It felt somewhat similar to having to pull out the right lens for any given moment and knowing that the right lens was there for you. If you see something interesting, as a photographer, your best camera is the one you have on you. With a lens kit like this, it might just give you a better opportunity to capture life in a different way.

Wideangle shot of a chess board

Its really easy to attach and detach the lens set because of the magnetic rings, but just like with any lens set, removing and replacing the lens can become a task that is best learned after some practice to be able to just use the lens quickly.

Wideangle shot of my bike

Wideangle shot of my bike.

Normal shot of my bicycle

Normal shot without the lens set attached to my bike.

Its always somewhat difficult trying to get pictures of animals, with the macro lens its even harder.

The lens are sharp, but it may take some manual focusing to get the best results. I haven’t noticed the lens affect the color of the pictures that I’ve taken, they’re not very thick lenses, nor have I noticed the coating on the lenses make aberrations in any of the photos I’ve taken with them.

Wideangle Shot of CoffeeMacro Shot of coffee bubbles Stumptown coffee cup wideangle shotStumptown coffee cup stamp print macro shot

This is a fun lens set that opens up the possibilities for even more interesting phonography(phone photography).

Overall

Pros:

  • Glass elements in lens, sharp photos
  • Aluminum housing
  • Very light (in weight) lens set
  • Small size
  • Decent Price point from a great company

Cons:

  • Twenty bucks, albeit, its reasonable pricing
  • Takes some getting used to, to know always know you have the lens right there with you
  • Sometimes you need to use manual focus, which can be tricky with some phones

I give this accessory an 8.5/10; get the lens at the Photojojo Store or on Amazon.

New Design for the Blogs

New Blog Design

I recently re-designed my blogs. It follows some of the same principles that my main website has, which is simplicity, something I can be proud of, something cool. The whole theme framework is built to be responsive. It works well on modern browsers. I still need to clean up some of the code and I'm planning on progressively making updates to it.

The Cigar Box Camera

I've been interested in shooting with a pinhole camera for a while. So I decided to create one... I was inspired by other people who've used cigar boxes as a base for their pinhole cameras. I've mulled around with how cool it would be to create my own, even possibly having a detachable back for 4x5 exposures or even having interchangeable lenses. I came to a point in dreaming about this to actually making it.

A few weeks ago, I started looking for a box. I walked into a cigar shop hoping to find a box that would fit my loose specifications, should look pretty light proof and sturdy. I found this San Luis Rey Cigar Box which happens to be abbreviated into SLR on the lid. The lid itself is a sliding lid which gave me the impression that its pretty light proof.

When one of my friends had heard of my project, he surprised me with a drillbit and drill... He knew me well enough to make this happen...

The Cigar Box Camera

After I bought the box, I shared the idea with my friends. I was already excited for this project because all the rest of the work that needed to be done was just putting in a hole, light proofing the box, and getting some light sensitive paper. It was a simple idea, but that idea somewhat evolved. I thought to myself, while I make a pinhole camera, I could also use the same pinhole for another one of my cameras. Then I thought, well, why don't I mount it to the box?

The Cigar Box Camera

So, here it is... The ingredients:

  • Cigar box
  • Slr Lens back cover
  • SLR body cover
  • Black sheet of foam
  • Spray adhesive
  • Super glue
  • Aluminum can
  • Cardboard

The tools:

  • Needle
  • Drill
  • 50mm drillbit (or drill bit the diameter of your lens back cover)
  • Scissors
  • Exacto knife
  • Ruler
  • Compass or circle template
  • Pencil
  • Black permanent marker
  • Sandpaper
  • Saw
  • Lighter

First things first, safety first; if you're a child, please seek some assistance from an adult. When sanding and sawing, wear some goggles and a face mask to prevent inhaling dust. Be careful with the Exacto Knife as its very sharp.

Okay, first thing I did was measure the box and mark the center. The following picture shows the box marked diagonally to find the center.

The Cigar Box Camera

Once its marked, punch the center with a nail enough to create an indent in the box. This helps the drill to remain in the center of the box.

The Cigar Box Camera

Sand off the area that was drilled.

Now the following procedures aren't pictured... because I really got into the project...

  1. Measure the thickness of the wall where you've drilled the hole
  2. Clean the inside of the area where you've drilled the hole with a wet paper towel
  3. Take the lens back cover and carefully place it in the hole to try the fit, sand paper if its too snug. Make sure that you mark the area where the lensback can accomodate the camera body cover
    The Cigar Box Camera
  4. Carefully saw off the area marked
  5. Sand down the lens back cover
  6. Superglue the lens back cover to the drilled area; make sure to not push the lens back cover too far that you can't replace the the body cover.
  7. Measure the inside of the box
  8. With those measurements, mark the black foam to be cut for the interior of the box. You may need to adjust some measurements for the thickness of the foam.
  9. Test the fitting of the foam in the box
  10. Clean out inside the box with a paper towel
  11. Mask the outside of the box and stuff the lens mount with a paper towel or a crumpled up piece of paper
  12. Feel like you're almost done
  13. Spray the interior of the box with the spray fixative
  14. Spray the foam pieces with the spray fixative
  15. Remove the piece of crumpled paper towel or crumpled paper
  16. Carefully place the pieces of foam
  17. Carefully place the foam pieces inside of the box
  18. Spray the inside of the lid with black spraypaint or use a marker
  19. Take the camera body cover, measure and mark the center of it
  20. Make an indentation in the center of the outfacing part of the camera body cover
  21. Carefully drill the center of the camera body cover
  22. Shave and sand down the center of the hole
  23. Take the aliminum can, cut off the lid and bottom of the can
  24. With the circle template, mark a circle and cut it out
  25. Using the needle, puncture the aluminum
  26. Sand down the area of the puncture
  27. (Realize that this is taking so many steps)
  28. Using the black marker, black out the cut out, punctured aluminum
  29. Affix the pinholed piece of aluminum to the inside of the camera body cover using superglue; make sure to center the pinhole to the camera body cover
  30. TADA, You're done

Just realized, this post too long... don't read.

Use a piece of black tape to cover the hole and use it as a shutter, when mounting an SLR lens to it, use the lens cover as a shutter. You might want to measure the focal length required for your lens before using it. I created a removable back for my lens.

Now the next part of this project is to get some photo sensitive paper 4in by 5in, or make some cyanotypes using this cigar box camera.

Finally Processing Film

After weeks and weeks of planning and hesitation, I finally did it. Today I processed film. I mixed my own chemicals; I used Kodak's D-76 solution for the developer, getting the temerature just right was a pain. I felt like a chemist. Once I got everything together, I couldn't wait to try it out.

IMG_9532

These are the tools...

IMG_9536IMG_9539

Developer, fixer, and thermometer

IMG_9535IMG_9534IMG_9538

A two jugs (one for the developer and fixer), some Kodak Photo-Flo solution, and lastly, the developer tank. I mixed everything up, in hopefully the right amounts... and I poured them into the containers.

IMG_9550

I'll post the results on the photo blog soon. (P.S.: Last photo taken by Jason Slavin.)

The New Website

This is what I've been working on for the past month or so...

Screenshots

It was a fun and arduous task to design and build something simple. Every time I redesign and rebuild my site, I always want to make something I can be proud of. I wanted to make something that said something about me and my views on design. I wanted a clean break; behind all this is wanting to start all over again, wanting something simpler than what I had before.

I stared with how I identify with my site, my “brand,” and thought about how it feels to be me and to do the many different things that I do. The site is divided into four parts: first the landing page, and three blogs (photo blog, projects blog, and personal blog). I designed for the two real aspects of the site.Trying my best to unify and simplify them.

When it comes to the brand identity, its not fully formed. I don't really have any idea where this kind of creativity would lead me, but its part of my job. Doing things like this, doing things for myself help me create better for the company I work for. I design user interfaces there that are unlike this. They tend to have more complexity, that I'm trying my best to simplify with great UI experiences.

Prototype3

With work like that, there's just... A lot. A lot of thinking, drawing, designing, rendering, and designing; measure once, research use, measure twice, research again, think think think, study, coffee, bathroom, and repeat.

When I come home, I'm constantly thinking of other things to work on, projects or things to make, portraits to draw, portraits to take, my website to design. This redesign is a product of that longing to create.

Under the Hood

None of this would not be possible without Google. The landing page is built on the Google App Engine and the blogs are built on top of Blogger with a template built from scratch. The concept is about freedom. Google empowered me to create. So, thanks Google.

Among the other things:

This is it for now. I'm thinking of releasing the framework for this blog theme as something that other people can use. That would be really cool. Right?

The Portfolio Project

I'm currently working on gathering a body of work that I've done with my hands. A body of work that would most likely consist of photography and maybe a few sketches that I've done in the past. Its a work in progress and I've sandboxed the work in aarondelani.com/portfolio.

Screenshot of Portfolio in Progress

Building most everything from scratch has brought me to discover certain challenges that comes with designing an interface that is intuitive and hopefully does not take away from the experience of the art itself. I want to create a framework that helps the artist showcase their work without disruption. I'm still in the early stages of development of a simple way of presenting this. I have a small set of requirements so far:

  • Has to be intuitive to navigate
  • Should not distract viewer from work at hand
  • Should be a seemless and intuitive experience on various devices
  • The framework must be extensible to various content management systems including blogging applications

This is a long overdue project I'm glad to have started undertaking. I'll be updating the site, changing things and continuing to prototype a possible open source framework for visual artist who would want to showcase their work in the same way.

I'm excited, and if you're reading this and interested in collaborating (mostly with code implementation) let me know.